Project Cherokeeper -- my 1997 Jeep Cherokee XJ -- needed a little protection for its soft belly. The aluminum transfer case is totally exposed and if it hangs up on a large rock, it can crack. And if that happens, neither axle is moving and I'm going nowhere.
There's a few aftermarket ones available but I decided to try and make one myself.
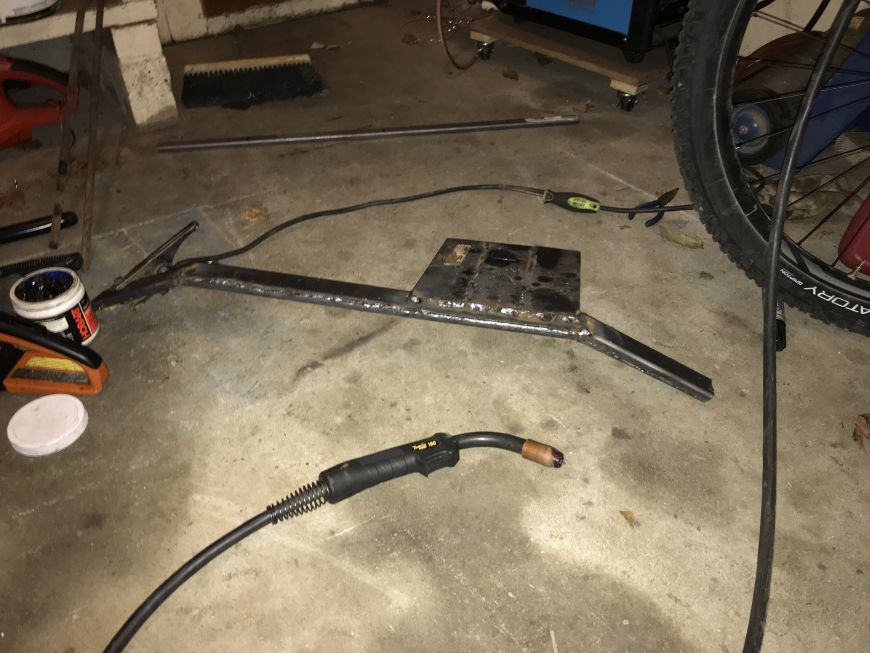
The only place in town with a decent selection of metal was Homeless Despot, err, I mean, Home Depot. But they didn't have square tubing in anything near thick enough, so I bought two C-channel sections of steal, 1/8" thick, and welded them together. Then I chopped it up a little with an angle grinder with a cut-off wheel, welded it back together, and the next thing I know I had something looking like this:
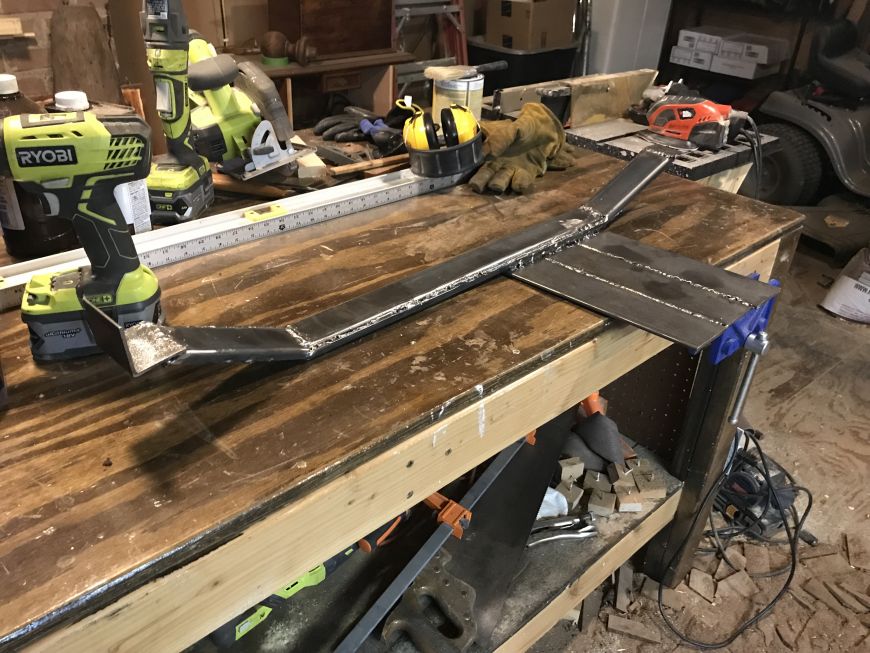
Home Depot also didn't have large enough pieces of flat 1/8" steel so I hade to weld three smaller pieces together. Then I welded that to the main section of steel where it will cover the transfer case once bolted to the chassis.
Now the question was, how to bolt it to the chassis. It's not a simple as bolting it to the bottom of the "frame rails" because there's no (easy) way to access the inside of the rails for the nut/bolt. My plan was to use some angle iron welded onto the ends of the main section of steel in such a way that a bolt could go all the way through the unitbody "frame rail" and the nut would be easily accessible on the other side.
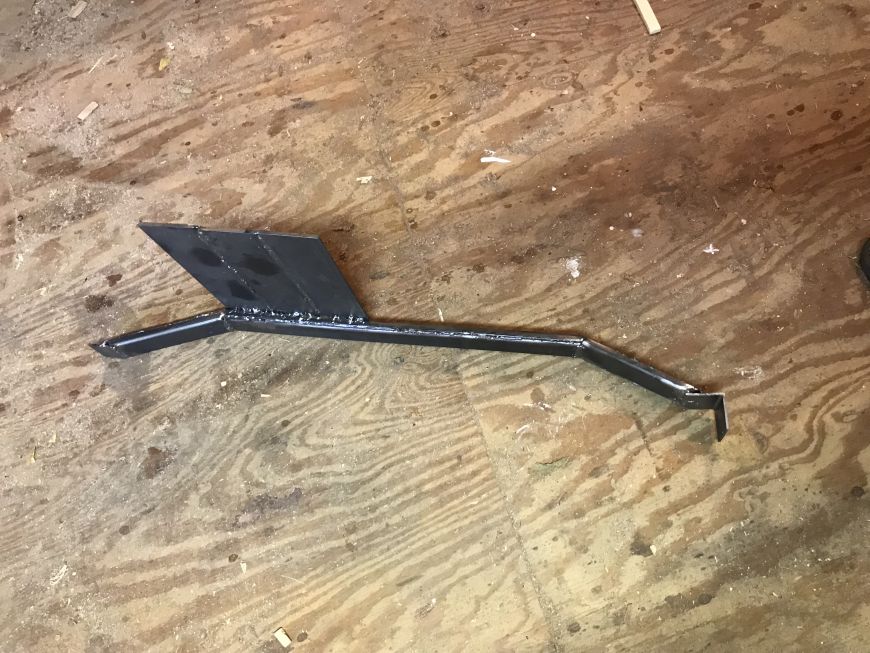
So that's what I tried to do, except that it wasn't long enough, no even close. So I just welded a piece of angle iron on one side and a flat piece of iron on the other.
This was my first time welding heavy steel in over a decade (wow I sound old...) so it was a learning experience as much as it was a functional project - hence the booger welds.
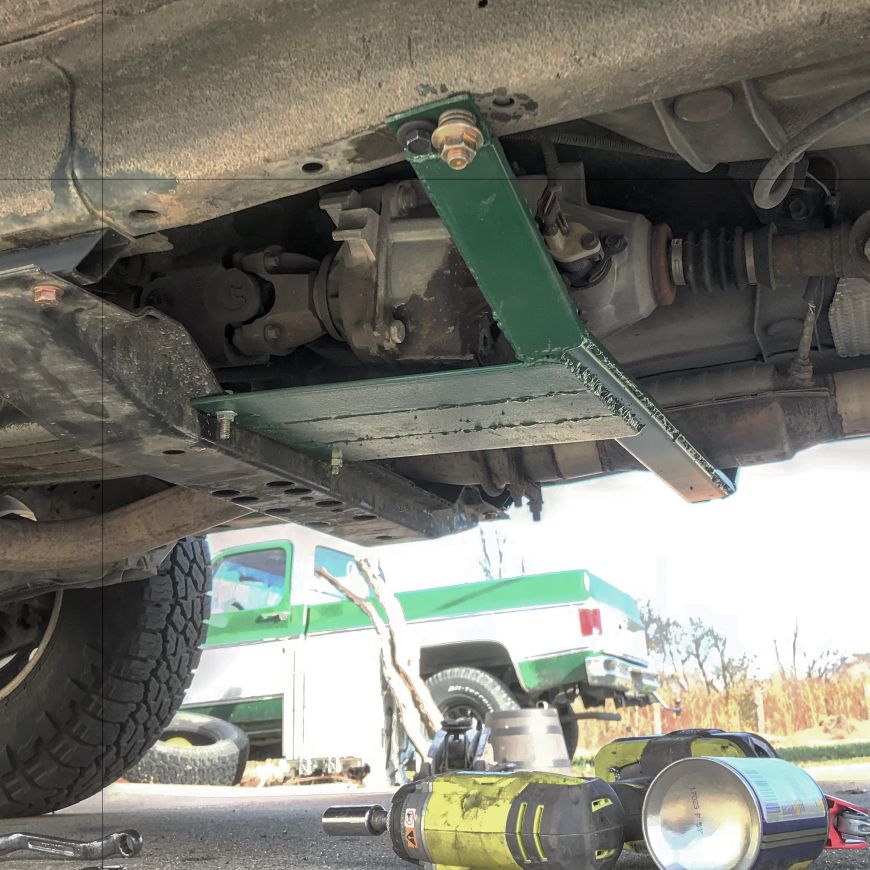
Now came the time to bolt it to the chassis. I used a jack to lift it into the position and thankfully it fit perfectly. I drilled the holes, lowered it back down, and began the process trying to get a nut into the chassis frame rail on the side without the angle iron. I first tried a "blind nut insert rivet" but it was a complete failure. Once it mushroomed and I tried to back the bolt off, it just spun. No way to get the bolt and install tool off, so I cut it off with the grinder.
Next I tried 1/2" grade-8 carriage bolt with a square washer that fit perfectly inside the frame -- left-over hardware from installing a trailer hitch. I had to widen a hole further down the frame (the hole was already there but not big enough, I think it's a tow-hook point) and it worked perfectly. However, these bolts were much bigger than what I had originally planned on using and I drilled the holes too close together, so I could only use one. I used a large sheet metal screw in the other hole -- just because, why not -- and a bunch of lock washers on the main bolt to make it all fit. It looks a little silly but it's fully functional.
Two more grade-8 bolts to fasten it to the crossmember and it was done!
Should I have just bought an aftermarket one? Yeah, probably. They're only $140-ish from Rusty's Offroad. And yeah I didn't spend that much on materials but the through is I did spend plenty on metal that should be thicker honestly and hardware which wasn't cheap and much of it was wasted like the stupid insert rivets. Oh, and I put at least 6 hours into building, painting and installing this thing. Time that could have been spend on one of at least a dozen other projects I have going simultaneously right now...
But half the point was learning to weld and fabricate things myself, and to that extent this was a big success.


